Thanks for stopping by! This is my corner of the blogosphere where I'm keeping track of
styles/techniques/products, lessons learned, my to-do list, and favourite links.
Feel free to offer any comments, feedback, or advice - I'm learning as I go !


Showing posts with label mohawk. Show all posts

Monday, March 12, 2012

The Loc Hawk

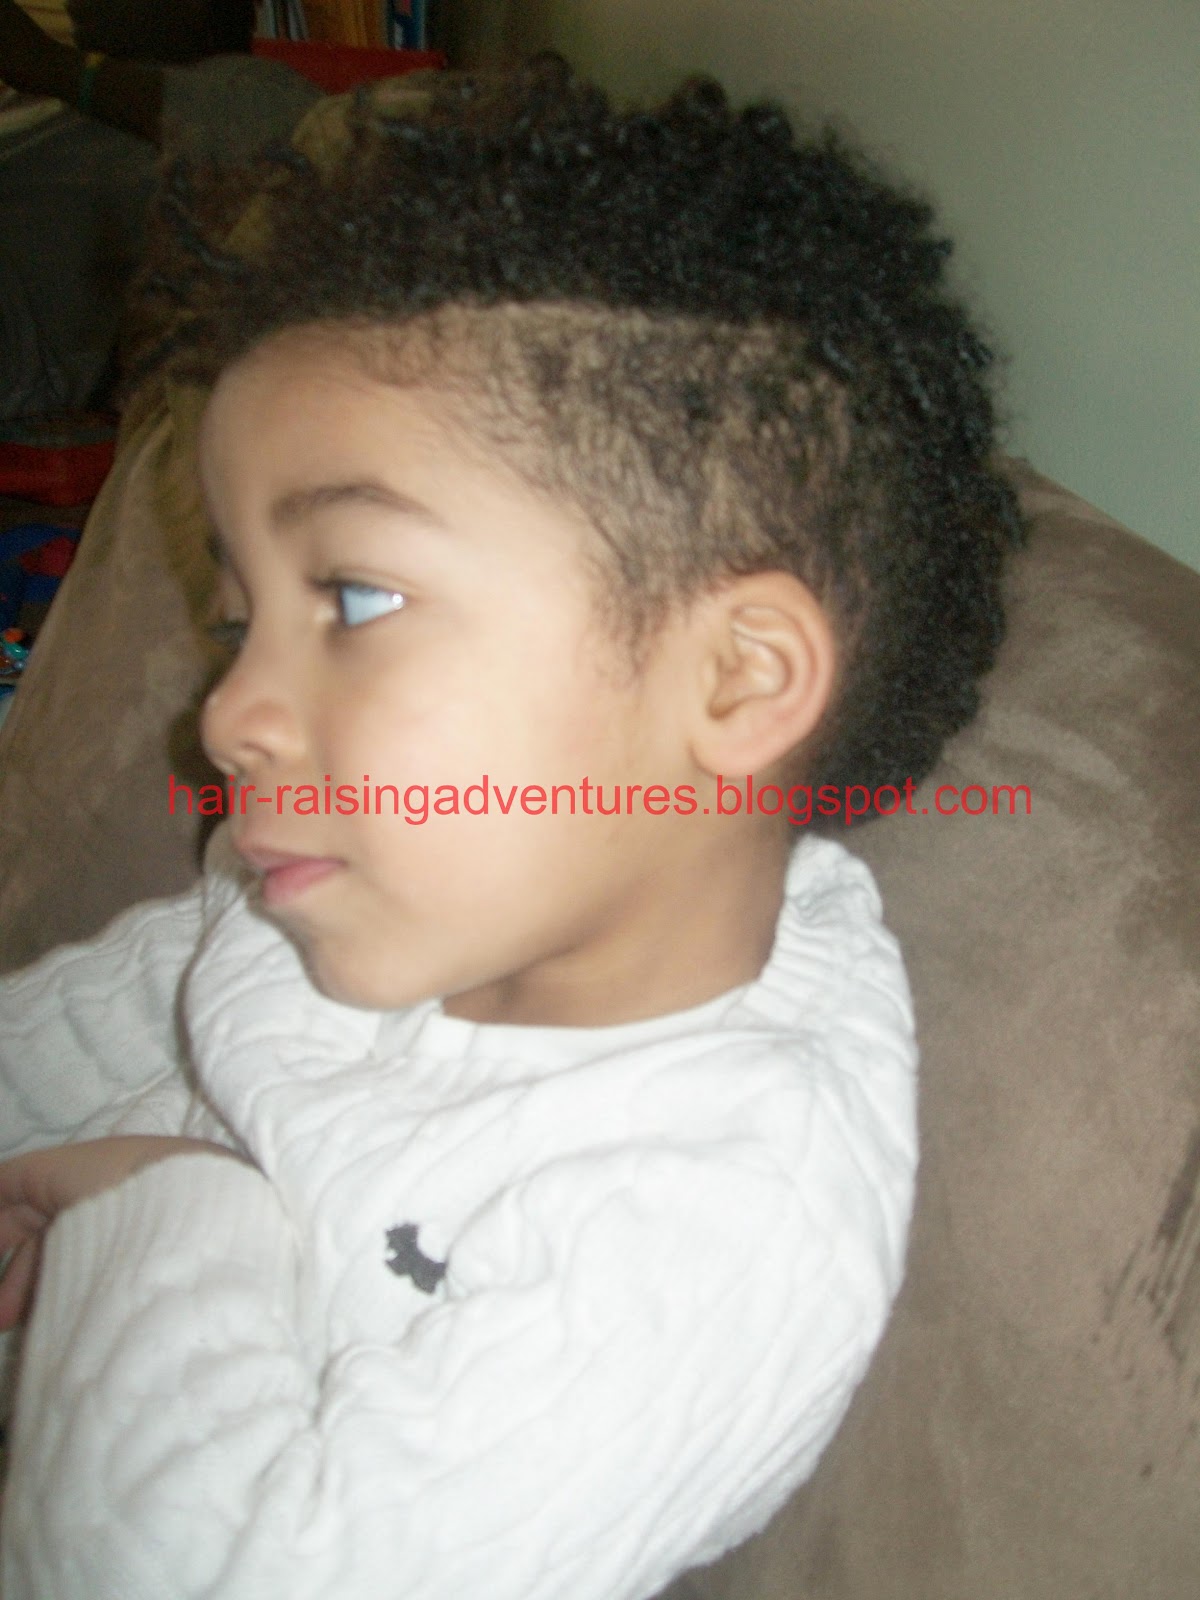
Little Brother K has been sporting a new 'do - the "loc-hawk"!

Last time I updated here about K's hair, I had just put in a headful of two strand twists. 

I was in a dilemma about to twist or not to twist, to cut or not to cut, and to loc or not to loc.  Now it seems I've done all three!

For a while, I went with twisting. Here is K's hair on New Year's Eve: small two-strand twists.


We stuck with twists for a while; long enough that they started to loc naturally.


K's own photo of his locs at the front
K's curl pattern in much tighter at the front and the back of his head. His hair is looser and finer in the middle. 

The varying sizes of K's curls, compared to a marker

His hair was beginning to loc quite nicely at the front and back, but the middle was not loc'ing well at all. I started to help the locs along, using my homemade interlock tool (literally a paperclip with masking tape around it to avoid snagging). 


I use a 4-point method similar to the one used in this video by DynamicRunner. 

K actually enjoys getting his hair done these days, so once or twice a week while he watches TV, I have him sit for some re-twisting/interlocking. The locs continue to be a work in progress, some are well-established while others need more time.

Here is an idea of the thickness of the locs:

K's locs are a little smaller than a pencil in diameter

And now - onto the CUT!

To give K's hair a new and interesting shape, we decided to cut the sides into a mohawk - technically a loc-hawk? Using the electric clippers on number 1, I cut down the sides and left the locs at the front, top and back. 


K loves his rockin' new look!


Saturday, November 5, 2011

Cornrows into Tucked-in Twists


This style evolved from a previous style (see more here, at Making the Most of a Hairstyle).  JJ had a few braids at the front, and some cornrows at the back that still looked decent - even after 3 weeks - so I wanted to incorporate them into this style. 

I started with still-decent-looking braids at the front (bangs) and back (under the puff):


I undid the bottom row of braids, and undid the braided ends of the cornrows.

Then I cornrowed the sides up & towards the back. I secured each section in the middle of JJ's head with an orange ouchlesss band, and twisted the ends.


I added Halloweeny-colored beads to the bangs. JJ loves to whip her hair. 


I also twisted the twists and tucked all the ends in. JJ's hair is long enough that I didn't need to use pins.


Finally, for school and for eating and drinking, I tucked the long, beaded bangs into the twists. This helped to keep the braids clean (e.g., out of her food!!)  and helped keep her classmates safe. Did I mention she likes to whip her hair?


This style lasted another 2 weeks!! And got tons of compliments too!! 

Yes, I am patting myself on the back -  almost exactly one year ago I wrote my very first blog post!!  I have learned sooooo much since then! 

Thanks to all of you who have inspired me, and to all of you who have stopped by over the past year to take a peek at my hair-raising adventures! 

Saturday, May 28, 2011

Protective Style Challenge Week 2

....I'm way late on posting here, but this is what I did for Week two of the Beads Braids & Beyond one month protective styling challenge.


At the front I did some fairly small - but not quite mini twists. JJ likes them to fall over her face like long bangs.

I cornrowed the sides and did twists at the back in a mohawk style. I struggled a bit to bring the hair from the side cornrows together into the twists because I didn't want to use any elastic bands as I normally would when doing a style like this.  So for each twist I took a section of hair from each side. This worked well, but I had to really concentrate when I was doing it (oh well, less Shrek for me).

When we went out, I gathered the bangs back with some twisty rope and incorporated these into a ponytail with the twists at the back (bottom right).

These have held up very well for the week. The twists at the back became twist-outs for Friday and Saturday. After swimming lessons (today) I planned to wash JJ's hair and restyle in small twists for the last two weeks of the protective styling challenge. However, plans changed - more on that to come in another post....


Tuesday, May 3, 2011

Evolving Mohawk

I knew we were going to have a busy week last week. In preparation for the craziness, I decided to go with a style that would last a while, but have potential for quick changes.

washed, detangled, ready for stylin'
I started with a "mohawk" style: cornrows towards the top/back of JJ's head. I gathered the cornrows in the centre of her head with ouchless bands, twisted the ends, and added spring-coloured beads and snaps.

from the side

from the back - having a cuddle with Daddy

Later in the week I took out the beads for a simpler look.

But the look was too simple according to JJ. So we went to the opposite end of the spectrum. I added in a bunch of colourful clip-on braids (okay, so I am not a fan of "extensions" on young children, but these are more about fun). I gathered the twists and clip-on braids into a ponytail at the back of her head with some matching bands. The daycare teachers called it her "Avatar" hair. This lasted 2 days.


Then I took out the ouchless bands, added star ballies, took out the twists and planned to leave the ends as puffs.


JJ was not in agreement however, so I quickly did some 2-strand twists and finished with star beads. She loved the star theme, as did everyone in her daycare class.


Then came swimming lessons, and I wanted to take the beads out. I sometimes leave beads in for lessons, but I'm always wondering if a bead falls out - will it block up the pool or something? So when I think of it/have time, I take out beads for swimming.

The cornrows were pretty fuzzy by this point (Day 8) so I decided to embrace the fuzziness (no use re-doing right before swimming). I gathered the cornrows into a few piggyback ponytails right at the front to bring JJ's hair out of her face. I then detangled the once-twisted hair with conditioner, added a little product, and made small ponytails down the back of her head. I tried to work the hair from the smaller ponytails together so they looked like one long ponytail in the back.


I was very happy to get a lot of mileage from this mohawk, and JJ was happy with all the variations!

Thursday, December 30, 2010

Holiday Hair Pics

I did a "faux-hawk" style with red and white beads. Oh - and a few green and red beads too. I made parts from back to front with corn rows, and then gathered the ends of the corn rows into twists. It took longer than our usual hair time - JJ watched a feature-length video twice (= 3 hours!!). It's much fancier than the usual (I lean towards protective styles most of the time).


Note JJ's brush - she was styling her own doll's hair. JJ does have dolls with curly hair too - this was her choice from the store with her Christmas money from her uncle. Sigh...long blonde "princess hair".