Thanks for stopping by! This is my corner of the blogosphere where I'm keeping track of
styles/techniques/products, lessons learned, my to-do list, and favourite links.
Feel free to offer any comments, feedback, or advice - I'm learning as I go !


Showing posts with label yarn. Show all posts

Monday, March 12, 2012

A Month of Yarn Twists

Hi everyone!! First, I'd like to thank you for your patience as I try to balance family/work/life/blog. Blogging has certainly taken the back-burner, but I do have a line-up of exciting hair stories to tell. Slowly but surely, I'll get them out!

I wanted to start by sharing how JJ's sparkly twists for New Year's Eve ended up becoming a longer-term protective style.

When I started the yarn twists, I figured I would leave them in for a few days post-NYE. I wasn't planning on leaving them in too long, because I figured they'd be a bit too "flashy" for everyday. But as you may remember, JJ cut off a big chunk of her own hair on NYE, while I was taking a break from finishing up the twists...

So I decided the yarn twists would stay in a bit longer to buy some time (hair growth time!) before figuring out how to camouflage the short hair in her next style.

Luckily, the sparkly-ness of the yarn twists was quite subtle. The subtle but sparkly twists stayed for all of January! I washed them as per Rory's detailed instructions about washing yarn extensions at Chocolate Hair Vanilla Care. I also spritzed frequently with diluted Taliah Waajid Protective Mist Bodifier or live clean Exotic Nectar Argan Oil leave-in spray.

Here are JJ's yarn twists, not too fancy for the mall!

The beads stayed in for about a week.
Once the beads were out, I knotted the ends.
After about three weeks, I could not take the fuzz at the front anymore! The front yarn twists came out, and I did five simple flat twists towards the back. The back yarn twists stayed in.

Too much fuzz!
Flat twists at the front
After 4 1/2 weeks, I undid the knotted ends. The twists were super easy to unravel and the yarn actually seemed to help keep the two strands of the rope twists very distinct. There was no tangling of the two strands together as I unravelled the rope twists; usually JJ's hair does tangle with long-term 2-strand twists.


I left them as a yarn + hair twist-out for a day (sorry, forgot to take a photo of her whole head!). 

The next day I took out the yarn, by simply sliding it off of JJ's hair. Again, I was surprised at how non-tangled JJ's hair was, at how easy it was to simply untwist the strands, and at how moisturized her hair had stayed. 

And the patch of cut-off hair gained some length! 

JJ's hair went straight into another protective style - cornrows and box braids - for the month of February. Hopefully I'll catch up on blogging about February's style before too long - but here's a sneak peak in the meantime...


Wednesday, January 4, 2012

Sparkly Twists for New Year's Eve


This year JJ wanted a special style for New Year's Eve. She requested a  "sparkly" look. This look was initially inspired by a photo shared on Hair-Raising Adventures' Facebook wall, of Des from Girly and Curly.  In the photo, Des has some gorgeous braids with sparkly Bling String woven in.

gorgeous, hey? see more at Girly and Curly!

Although I wasn't able to find Bling String here in Canada, I happened to come across some sparkly yarn (Vanna' s Glamour™in onyx) at Michaels, and figured I could incorporate this somehow into JJ's hair. When I showed the yarn to JJ she absolutely loved it. We looked through some blog photos and decided to take the plunge and do some yarn twists, inspired by Boo's recent yarn twists at Chocolate Hair Vanilla Care.

I pretty much followed the tips detailed at Chocolate Hair Vanilla Care in this post on tips and tricks for yarn extensions. I added 3 strands of yarn per twist; folded over to make 6 strands of extra yarn thickness per twist. Volume-wise, there was more hair than yarn per twist. In terms of length, the sparkly yarn was just long enough to add some beads to the yarn ends. I was not looking to add length other than what was required to add the beads to yarn, versus hair. The sparkly effect was subtle (and kinda hard to see in photos), but was exactly what we were going for.

some stray ends visible just above beads

As you can see below, I added some flat twists on JJ's left side. She loves to wear her hair "up and over". For NYE I gathered her hair into a ponytail on the right side.

Although she is **not** smiling in the photos below (need to work on that posing, JJ!)....JJ was very pleased with the look, and it was perfect for the New Year's Eve party we attended!

There's a little bit more to this story - some drama!!! But that will have to wait for another post - stay tuned....

JJ with Uncle E shortly after midnight!!
Happy New Year everyone - All the best for 2012!!

Tuesday, November 1, 2011

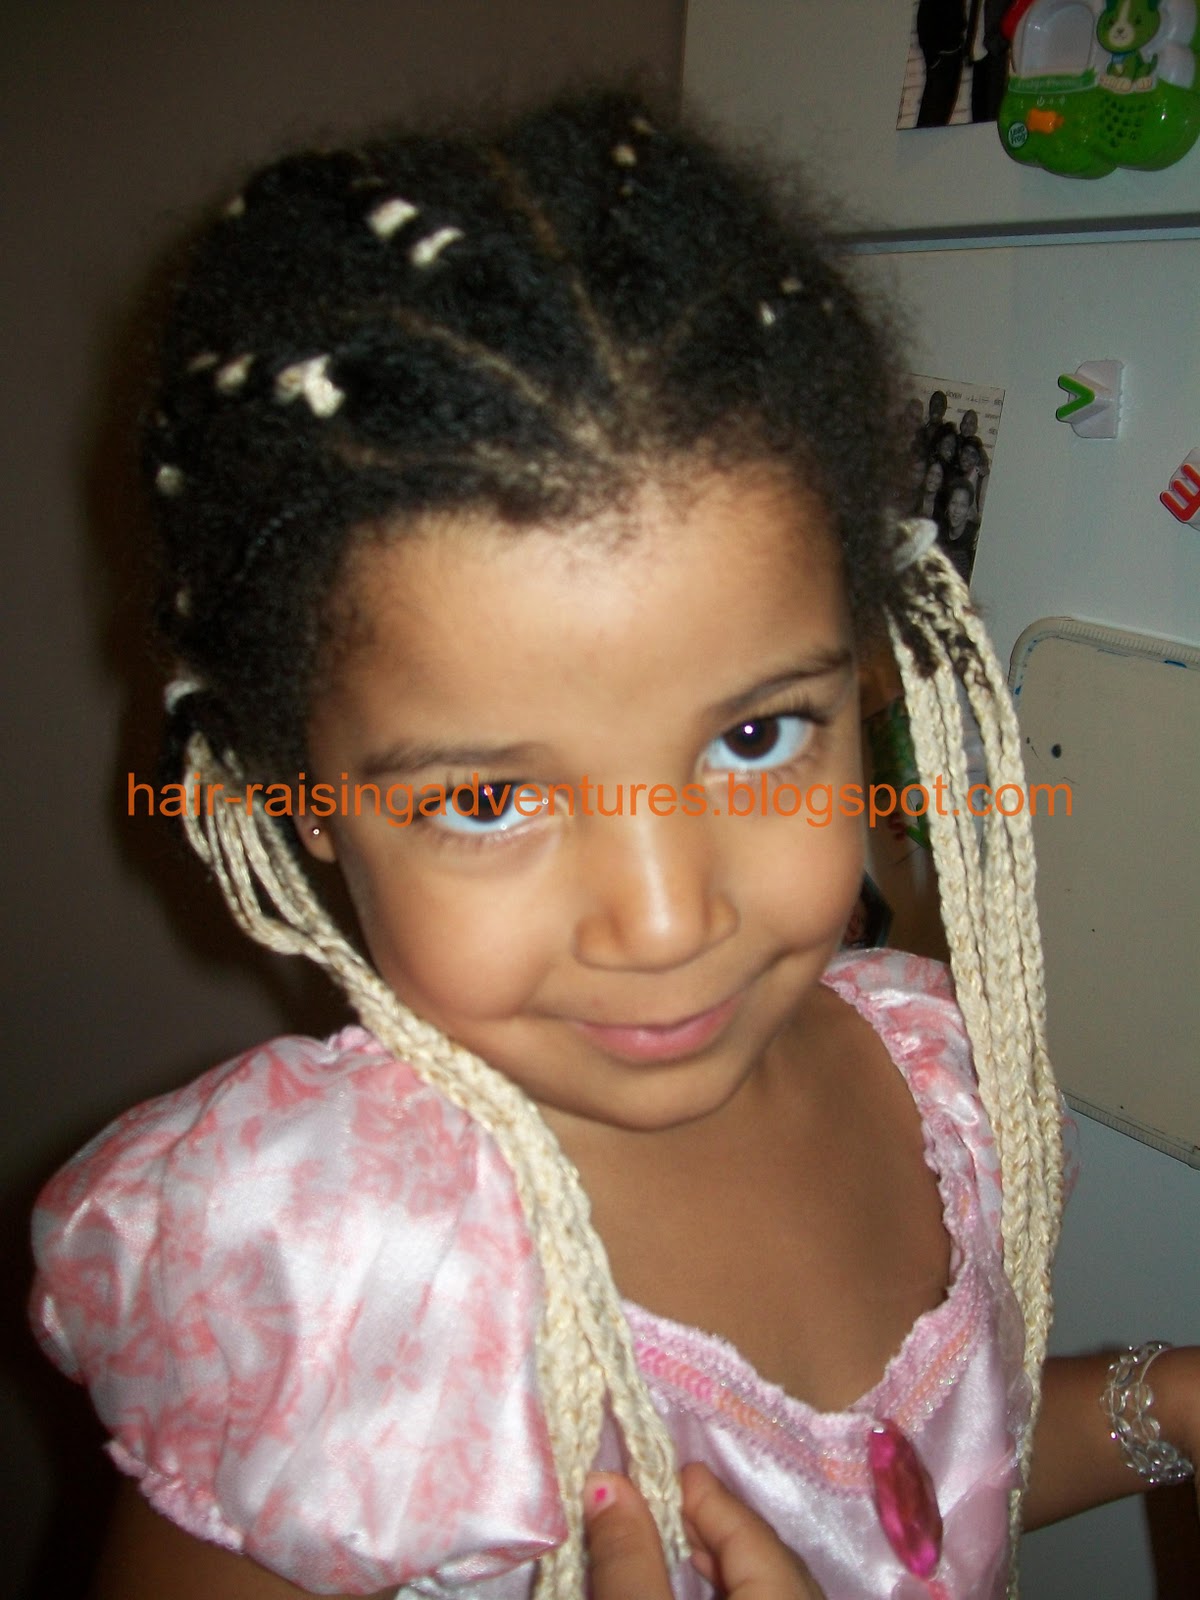
Halloween Style - "Rapunzel" Yarn Braids

JJ decided months ago that for Halloween she wanted to be Rapunzel. She had a very definite idea in her head. She wanted long, golden hair.

I, in turn, spent months trying to figure out how I would achieve this, as well as struggling with how I felt about her wanting long, golden hair.

A good friend encouraged me to lighten up. She said that she was sure that JJ wanting long, golden hair for Halloween did not necessarily mean that she disliked her tightly coiled, shrinkage-prone black hair. This friend reminded me of the many times that I have changed my look drastically for Halloween, theme parties and other special events.  This, she told me, was the same thing. It was one day, and JJ should have what she wanted.

After some thought, I decided to go with an interpretation of long, golden hair that would respect what JJ wanted, but would also incorporate her natural hair.

First we found some light golden yarn, with just a little bit of sparkle to it.


Working with clean, dry, stretched hair, I added in the yarn. 


At first I tried to do a two strand twist, half hair, half yarn. 


JJ decided it was too candy-cane-like. 

I tried another twist. This time I started with a flat rope twist into a two strand twist. She liked this look better, so we went with it for the rest of the hair. 


In the end she had six flat twists in the front, with the yarn incorporated into them. The parting style was copied from this simple braids into princess hairstyle at All Things Cute and Girly.  JJ had an additional 6 braids (with yarn incorporated) at the back, for a total of 12 medium-sized sections. I braided the ends of each section. The length of each section (once braided) was at her waist. 

I pulled the two sides together into side ponytails.


JJ also wanted to add this crown that a friend had recently given her. 


In the end, JJ was extremely pleased with her long, golden Rapunzel hair, and she had a great time at school and trick-or-treating.


Little brother's hair, on the other hand, was pretty low maintenance: white hat. 

BOO!


Happy Halloween!!!

One last photo: the next day at school Rapunzel style - pulled into a loose bun.


And check out these other great Halloween Carnival styles:

Photobucket

Got Halloween photos to share? Get the linky code and link up!

Tuesday, August 9, 2011

Criss Cross Twists - Inspired by Diva Locks


This weekend I didn't have any plan at all about how I was going to do JJ's hair for the week. I usually have some vague idea, but this time - nothing.

I checked out my blogger dashboard for inspiration, which was delivered immediately by one of the amazing blogs I follow:  Diva Locks, where The Diva's talented Hairdresser had created gorgeous criss cross braided ponytails.

I added my own twists to this style - literally. Instead of the braids I did two-strand twists. I also added in some purple yarn, because 1) I had promised JJ a while back that we could try adding some yarn to her twists, and 2) as you may have figured out, I like to experiment.

I started by washing and conditioning JJ's hair, and banded it in 6 sections.


I twisted each section into two two-strand twists and added purple yarn.

halfway done!
halfway done!
I then criss-crossed the twists (see  Diva Locks' post - criss cross braided ponytails for an extremely thorough description).

I ended the twists with beads - adding beads to the ends when they are just yarn seems so much kinder to JJ's ends, allows her to have the bling she craves, and it's so easy to just tie a little knot in the end of the yarn versus using snaps and/or elastics.


THANKS to Diva's Hairdresser at Diva Locks for the inspiration!

And a shout-out to the fabulous Precious for technical assistance with my blog!!!!!!!